We tinker: we create and build gadgets. Then, we leave work and do it at home, for ourselves.
Working on projects at home, in our garages and on our kitchen tables, is thrilling because we get to work on our own ideas. But tinkering at home can be tough without the financial support, the equipment usually available in a well-stocked lab, and the other engineering disciplines doing their parts. We’ve each worked out our own methods for getting things done (or done enough). The hardest part is getting started.
There are a few pieces of equipment and some websites you really need to know. Of course, what we think is important reflects our backgrounds and projects so we’ll tell you our biases upfront.
A little about us
Jen Costillo is one of the founders of Rebelbot, a software consulting firm. She is a firmware engineer who has done the occasional stint creating hardware designs. She also has an MBA with a focus on entrepreneurship.
El White wrote the book on Making Embedded Systems for O’Reilly. In her professional life, she is an embedded software engineer working on race cars, DNA scanners, and gunshot location systems. She is the founder of Logical Elegance, an embedded software consulting company.
Star Simpson got into tinkering early, finding it the best way to teach herself electrical engineering while growing up in Hawaii. She has since attended MIT for a while, worked on hardware projects for fun, built robots for academic research, and done some work in industry.
While Star started young, Jen didn’t start until her job left her with a need to get her hands dirty. Early in Jen’s career, she had a job that was primarily cerebral (researching technology and marketing). She’s a hands-on engineer so it wasn’t enough to satisfy her needs. At first, she was making quirky items that there wasn’t a market for, but she quickly had startup ideas. During her MBA program, she started making hacked-together designs to illustrate key points in class assignments. Since then, she’s primarily focused her tinkering on merging art and technology and attempted to extend those ideas into business ideas.
El has a different approach, preferring to see herself as a mad scientist, inventing gadgets to amuse herself and friends. She admits that she gets bored with the ideas once they sort-of work and often moves on to the next shiny object. While her first thought-project was a robotic dog (well before AIBO came out), she was just a software engineer at the time. Happily, she quickly moved closer to the hardware, found electrical engineering friends, and was able to create a TTL-UART to thumbdrive datalogger (when USB was new).
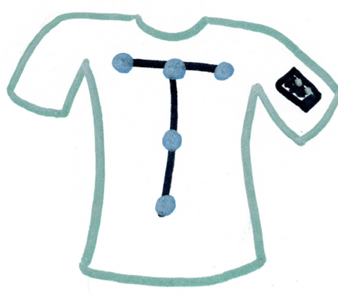
Since then she’s gone through a period that was all about things that light up (such as the year-round Christmas lights presented at DesignWEST 2012). Lately, she has been working on health related things professionally and it bled into her tinkering; El’s been playing with a shirt to correct posture.
The last few projects Jen has worked on have been for her RFID Dance Project which convert dancer’s movements into music and electronic wearables using sensor and light for dance performances.
As for Star, after hearing about a blind teenager who taught himself to see through sound, she’s been working on electronic glasses (think opaque sunglasses) that put out a click to help the wearer learn to echolocate.
Setting up a tinkering space
Whenever you are building things, there are bound to be specialized tools that will make your life easier. And they always cost a fortune. Some companies will let you borrow tools for a weekend; others frown upon you taking the $30k oscilloscope out the door: you probably should get permission before the security guard notices.
If setting up a space at home is difficult, you might look at Hacker Dojo, TechShop, or other local hackerspace. These are physical locations that can provide workspace and tools. They can be expensive but so is setting up your own lab.
Soldering irons
While it is possible to do some embedded systems tinkering without a soldering iron, you won’t get too far before it becomes a blocking item.
What you need depends on your goals:
- Will you be prototyping using PCBs or (solder-less) breadboards? (PCBs will need more soldering.)
- If you are soldering, will it be surface mount or through hole parts? The types of equipment used will differ.
- What is your budget for equipment?
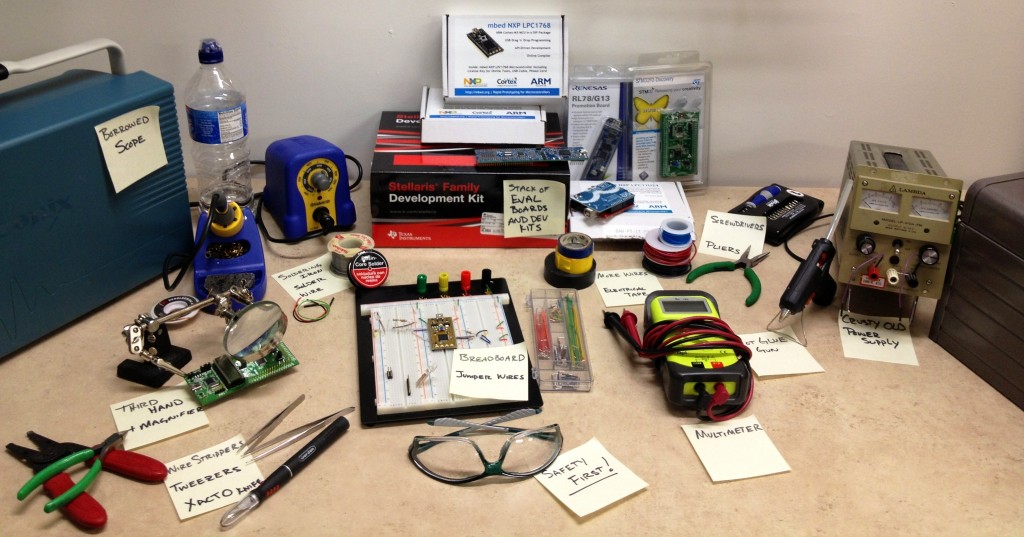
In general, breadboards are a cheaper way to start. They come in different sizes, get the biggest one you can reasonably afford, it gives you more latitude for future projects. When you get it, look for a kit of pre-bent jumper wires to connect pieces. Tweezers for dealing with tight spots, pushing the tiny wires in the tiny holes is much easier with tweezers. You may also want a few alligator clips (or hooks), some additional wires (which mean wire cutters and strippers).
You’ll probably still need a soldering iron. After Jen bought her sub-$100 Hakko FX-888, El tossed her old $40 Radio Shack model and bought the same. A crummy soldering iron will let you solder connectors just fine (well enough to work with a breadboard). But a good one lets you solder chips (and stained glass, but that is a different story).
If you are software engineer, or really, anyone who isn’t an electrical engineer, starting with PCBs is probably an advanced skill. Still, if you are going to do it, get the best soldering station you can afford (which if you are attempting to do surface-mount technology (SMT), should be around $200).
For either breadboards or PCBs, the soldering iron is not enough. You’ll also need tweezers (angled or flat), alligator wires, screwdrivers, wire cutters (angled is nicer), wire strippers, pliers, wire in different sizes (gauges), braided/solid, and colors. You’ll also need one clamps to hold a board (“third hand”). Oh, and solder, probably a medium to small gauge, preferably with flux. You may also want electrical tape, heat shrink tubing and extra hot blow-dryer like tube shrinker. Really, once you have all these things you’ll find other things you need, for example, a toolbox to store all this stuff in.
El suggests avoiding soldering as much as possible (but she came from the software world so that’s no big shock). She’s got an iron, some solder, wires, wire strippers and a magnifying glass. But she mainly solders connectors on things. And then hot glues them so they don’t break. Which they do anyway.
Jen’s more serious with a solder wick and solder sucker to get rid of excess solder. She’s also got solder paste, isopropyl alcohol, and horse hair brushes.
The board (and power supply)
Soldering irons (and all the gear that goes with them) are something you’ll want eventually, probably sooner than later. But you don’t have to start there. Start with a board, maybe a fully assembled Arduino if you are really starting out. That will give you a processor and some lights (and a huge number of add-on parts called shields). Then the big tool you need is a digital multimeter. A cheap $5 one is ok, you don’t need precision, just a check to see if the voltage is in the range intended and an ohmmeter to see if connections are being made.
If you go with a different board, you may need a power supply. Sometimes you can power them off of USB for programming but if you ever want to disconnect your computer, well, you need another power source. Batteries can be tricky; wall power is a lot easier to get started on. To convert wall power to something your board takes, you can get a bench top power supply ($70) which will be useful in lots of projects. A cheaper option is a tunable supply that has different voltages available (e.g., Adafruit has a DIY version). Another option is to cut up an old wall wart that supplies both the voltage and current you need.
Eventually, you’ll want an oscilloscope and maybe a logic analyzer. Bitscope and Seeed oscilloscopes and Salae logic analyzers provide excellent bang for the buck by attaching to your computer. More professional models can be in the $5-10k range for a starter unit (and maybe much higher for the one you have at work).
But back to choosing a board- what you need depends on what you are doing. But in getting started, look for free boards (there are usually a few available at DesignWEST and other conferences). If you have a stockpile, then you can figure out the details later. If you have to buy one, look for one that advertises it does things similar to your idea, particularly if you’d heard about it. The best part of well-hyped Arduino and Raspberry Pi is that lots of other people are using them so there are free tools and large communities. Most evaluation boards come with free compilers (and have onboard programmers/debuggers) but they are often limited in some way. If you spin your own board, you may need to invest in a JTAG (or SWD) programmer for the chip you are using.
Some resources we find useful
Sparkfun – A vendor of many prefabricated boards and pieces that make it so software engineers can build a system without even buying a soldering iron. And the tutorials section really can help. Great community!
Adafruit – Very similar to SparkFun but with a different set of boards. Check out their Ask an Engineer section as other people may be looking to solve your exact problem!
Arduino – El went for a long time thinking Arduino was a little silly but then she found a few people who never did embedded systems playing with Arduino boards, not realizing they were creating amazing embedded systems. With so many plug and play devices, Arduino really takes the hard out of hardware. Plus, it is a nice microprocessor and not hard to break out of the Arduino mold to get something easy to use. If you head in that direction (or you have other Atmel based boards), check out AVRFreaks.
ThingM – They make LEDs that you can program, for example to match your outfit, and then put with a battery in your shoes. Seriously, they make lots of neat lights, programmable with an Arduino.
Digikey – Hardware in depth, including datasheets. They are expanding into being a bit more user friendly, adding a schematic capture and lots of tutorials. Star has a Digikey policy: Never search! The product index is where it’s at. She uses Octopart to do more finding (and to get datasheets). There are other electronics distributors; if you can’t find things at Digikey, look at Mouser and Future. However, avoid Alibaba.com.
Amazon – Has a wide range of electronics tools at generally ok prices.
Microcenter, Fry’s and Radio Shack – Sometimes you need to see what you are getting. These physical stores can help with that though you may need to go to all three to find what you are looking for (and the best price).
Make Magazine – This is a magazine of people doing awesome stuff out of their house. The issue with the garage-created jet engine is an excellent read. But they’ve branched out into kits, many directed to the teen market so they are easy to use.
Oh, and El’s book – Making Embedded Systems. It is for people who start out in CS or EE and want to go to embedded software where a combination of skills is needed. It is also for people who tinker who want a more professional view and some tips and tricks on interviewing.
Finally, if you are doing this for yourself (and you don’t intend to productize it), sharing it with others will make development more fun (and can look great on your resume). Github is a good place to share software and Open Design Engine is a good place for hardware.

Note: this post was originally written in conjunction with DesignWest 2013 for the Start Tinkering presentation with


