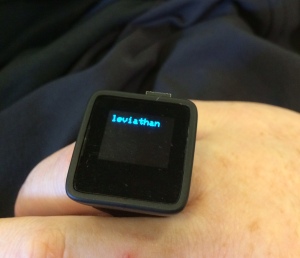
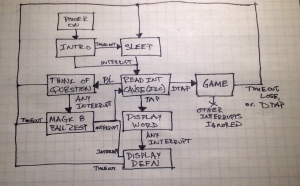
I got a MicroView: a tiny Arduino with a nice OLED screen. I want to make a ring with it. When I tap the ring, it should give me a word. If I tap it again, the ring shows the definition. I’ll call the ring WORDY and vocabulary geeks all over the land will rejoice.
I’m sure you are wondering how to build this (and not why I would want to). The critical component is the MicroView. Here, have a picture to see how big it is on my hand.
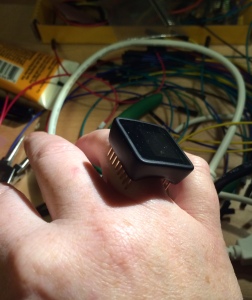
It fits reasonably well on my ring finger, easily on my pinky. Now all I need is:
- A battery
- An accelerometer
- Ring to mount it on
- Connecting all that together
Let’s start with the battery. It has to be small. When I measured the MicroView as consuming 330mA (5V), I was bereft. Of course, where was it putting the 1.5W without burning things? Once I read a handy book with a section on how to measure current correctly with an ammeter, I found that the MicroView consumes about 13mA with the screen lit and can be put to sleep to consume 0.13mA. And once I stopped trying to use STUPID math (thank you tymkrs IRC!), that meant I could expect a 50mAh battery to last for about 100 hours, far beyond my minimum goal of 3 hours.
Tangent: When I work on client projects, I’m quite disciplined, writing things down, looking them up, and double checking my math. It seems that on my own projects, I keep trying to shortcut to the most obvious solution. Maybe it is because this is Arduino-based so I think it should be easy. That’s dumb because I’ve used the ATmega328, it is not a simple chip. Adding a layer of niceness doesn’t make for an easy system, it just is one layer of niceness.
The next thing to add is an accelerometer. I like accelerometers: they give a layer of flexibility that is just lovely. I could say I want to “tap to activate” and have that mean: tap, move above some threshold, double tap, change orientation, etc. I could work out the user interface details after my prototype was functional.
Or it would mean that if I didn’t keep blowing up accelerometers. Naw, that’s not right, if I’d blown up the accelerometers in tiny little explosions, that would be better. Instead, I tried to use the Sparkfun MMA8452 breakout board. There is plenty of example code for this accelerometer on an Arduino. Funny thing though: the standard Arduino board uses 5V but has 3V out. And there were some writings about adding resisters to decrease the voltage that the 3V accelerometer part would see on GPIOs.
Perhaps I should have paid more attention. Though I did read it several times. I should have looked several plus one or two. I would never just try it if I had an EE to talk to, which I would at a client’s. (Sadly, my best EE friend moved to Seattle. He’s happy but I have no one to take to that Japanese place next to Baskin Robbins and bribe into telling me I’m about to do something moronic.)
Anyway, that accelerometer is dead. I forgot to do the voltage limiting resistor trick on my interrupt line. Whoops. (Since I need a low signal to get out of sleep, I used the internal Arduino pull ups. Anyway, that accelerometer is dead.)
However, Adafruit makes me think I’m not the only one with this particular issue as they sell the same accelerometer in a 5V tolerant breakout board. Two things you should know: it isn’t the same part (MMA8451 instead of 8452, mostly the same but not, you know, the same); and the address line is not 5V tolerant. I couldn’t get it to respond to the “who am I” register query so I kept moving the address line until that time I missed the 3V (output from the Adafruit board) and the GND, putting it on the 5V that is between them on the pins.
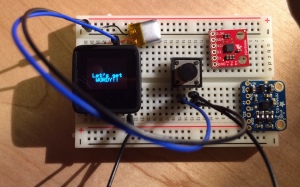
Here you can see a picture of my little breadboard with my two dead accelerometers. A new Adafruit accelerometer will be here tomorrow. My driver is in a better state (it worked right before the accelerometer stopped working) so I’ll be leaving it in the default address state.
However, this Adafruit bread board is just a wee bit too big. I mean, just a tiny bit too big.
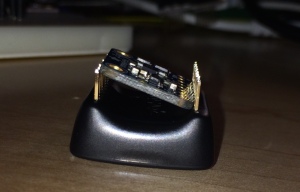
My plan involves a Dremel tool (and safety glasses and a mask). Should be no problem right? Actually, the top of the board has several 3-4mm of unnecessary board. I only need to shave off 1mm and it will fit.
In the meantime, the button works really well. If something happens to the accelerometer tomorrow, I’m going to radioshack to see if there are any tiny press buttons.
Stumbling along in the project, I have ring blanks. I made them out of freaky “cloud” clay I found at the hobby shop (D&J is awesome). I was hoping they’d have small LiPos, only in other things and long-thin ones for aircraft but they did have this cloud clay.
It is pliant when dry and super light. It says it doesn’t shrink but it totally does. It smells like hair conditioner. Nail polish works really well on it so even though I got white, my rings aren’t staying that way. It isn’t rubber like Sugru but it seems reasonably durable. I would like to 3D print a ring base but I’m pretty happy with my cloud clay blanks. Though I might try Sugru too.
Now, connecting it all together. Hmm… the new battery will have a JST connector. I can’t see how to keep that which means cutting that off and stripping the wires. But how to route them? I’d like to put them in something with a connector but then I have to run wires around my finger since the connectors are sorta big.
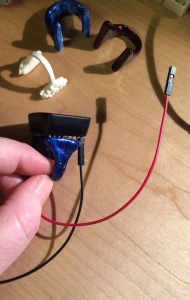
Yeah, those wires are pretty hideous. I guess I’ll wrap wires around pins and use a little bit of electrical tape method. I don’t like that either as it becomes a construction project to charge the battery but, hey, 100 hours means a lot more play time than the 3 hours I thought. Though, since the clay did shrink, some of the ring blanks don’t fit all of the pins (as shown). I can make some new ones, I like playing with the clay. (Did I mention it is a little freaky? It is weirdly weightless.)
As for the code, it is pretty simple. I’ll post a link. The flash based wordlist that gave me the most trouble (again because I went for the easy looking path instead of what I know to be true about the ATmega). Also, I want a much better word list. The GRE vocab list I started with is interesting but I know most of these words. Wordnik has a lovely set of lists and words but they aren’t easy to download (maybe there is an API?), On the other hand, the sleep and low power code went in without a hitch.
So, this is what I’ve been working on. It has been amusing and difficult. I’m ashamed of myself for blowing the accelerometers but sort of pleased with myself for using my downtime to learn things, even build things.

